
InfoTrack can be easily added to your Filevine implementation by any Admin-level Filevine user. Read below for step-by-step instructions.
Starting from Filevine, navigate to the Advanced Settings menu and click Integrations.
Search or scroll until you see the InfoTrack app. Then, click the green Activate button.
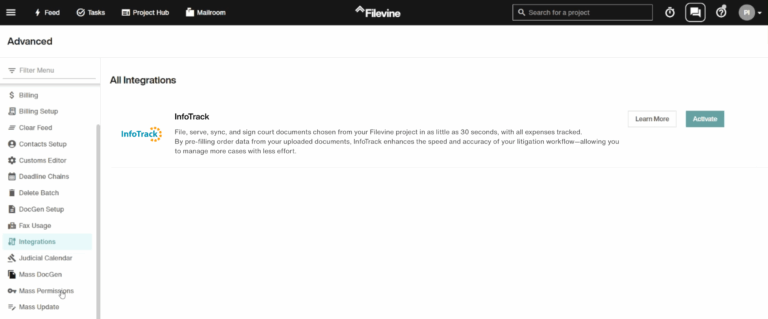
This gives permission for InfoTrack to initiate an integration communication with your Filevine user account.
Filevine users must have the necessary permissions to import custom sections.
Admin users can check these permissions by clicking their account menu button (the circle with your user initials on the top right) > Filevine Settings > Orgs > Advanced Access, then searching for the client’s account.
For the instructions below to work, all three of these settings must be switched on:
Import/Export Contact Templates
Import/Export Custom Templates
Customs Editor
Download this InfoTrack section file via OneDrive.
Back inside the Filevine Project Hub, click the hamburger menu on the top left and navigate to Advanced > Customs Editor.
Click Import/Export (top right corner) and Import Section into [Project Name]. Choose the InfoTrack section file you just downloaded (InfoTrackLinks0731.fvst).

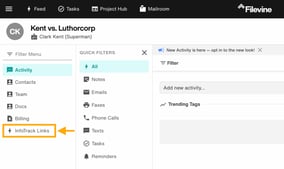
After importing the section, go back into any Filevine project and click the InfoTrack Links section in the left-hand menu.
Launch into InfoTrack using the Matter View button.
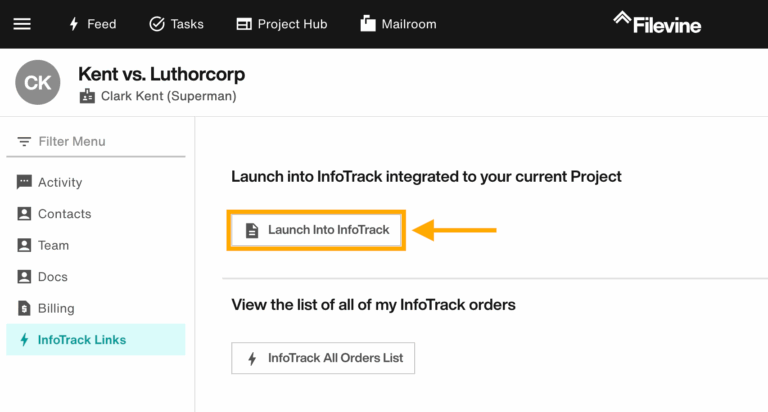
On the login page, choose Sign In with Filevine.

InfoTrack should now be integrated with the Filevine project you launched from.

